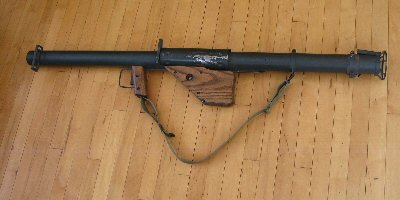
This page describes how to simulate fire for your bazooka in a safe manner. There are plenty of ways to do it and this is definitely not the only nor definitive answer. And it may not be the safest. Use your best judgement on how to operate in a manner that's safe for the gunnery crew and the public.
BACKGROUND: I've been building model rockets for 40 years and when I bought the bazooka it just screamed at me that a rocket assembly would be just the thing for our new toy. Right after we first got it we were at an event doing a firing demonstration. The other guys went through the M1903, M1, Thompson, BAR, and even a rubber rifle grenade that we fired downrange.
Then it came my turn to demonstrate the bazooka. We had drilled the procedure earlier and had all the accessories: bag, tubes, practice rounds, arming wires, and safety pin. One of the other guys described ther process as we went through the drill. While that was going on I could see a tourist off to the side, an older gentleman standing rock still with his camera posied, just waiting for the glory moment.
It never came. All I could do is pull the trigger and say "woosh!"
This is an attempt to correct that problem and give the public a little more bang for the buck. A touch of showmanship, as it were, while still maintaining safety. What I've done is make a small model rocket engine assembly, wire it to the bazooka so it doesn't move, and put an engine in it. If you're in the United States you can pick the materials up from any good hobby shop and put one together in a few hours. Or you can order the materials directly from the manufacturer, Estes Rockets.
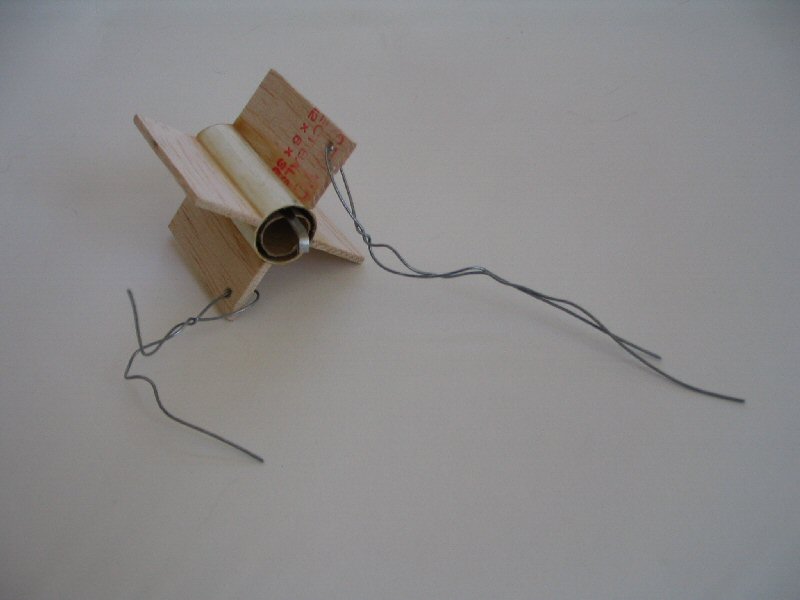
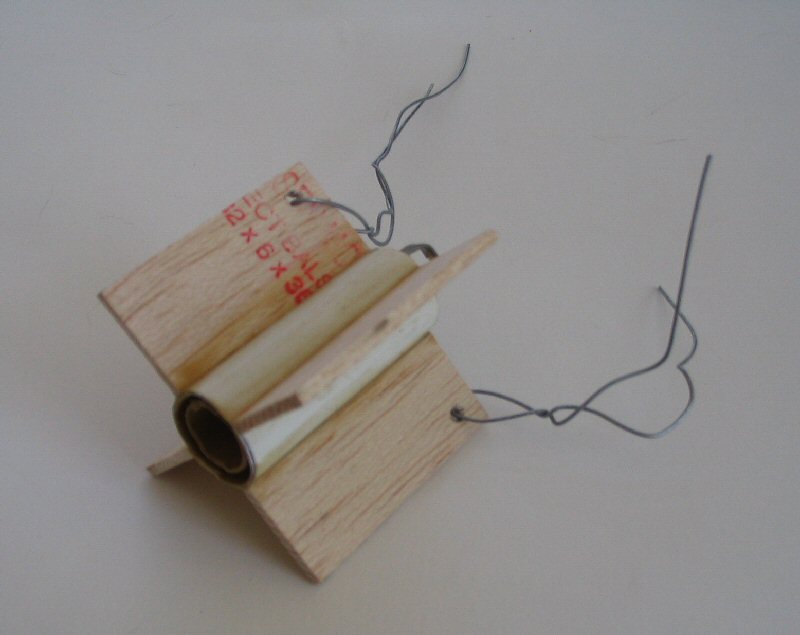
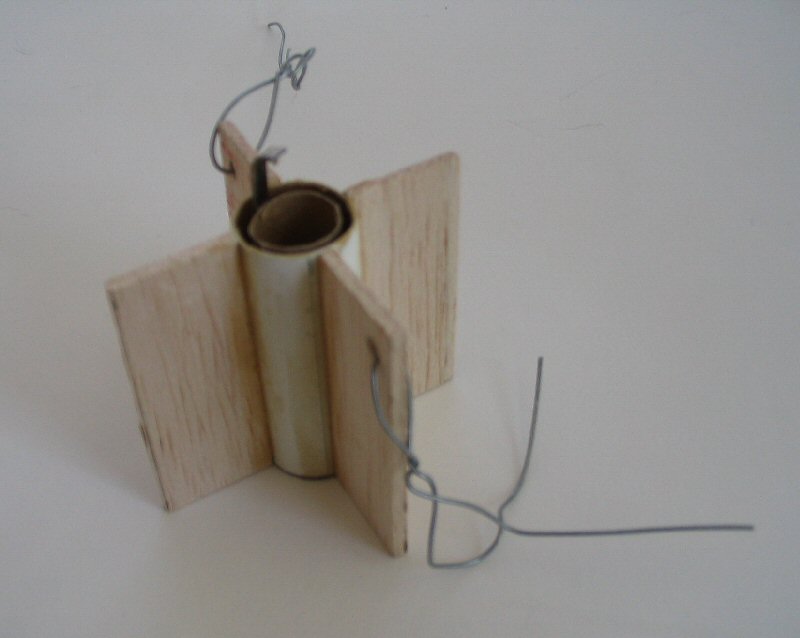
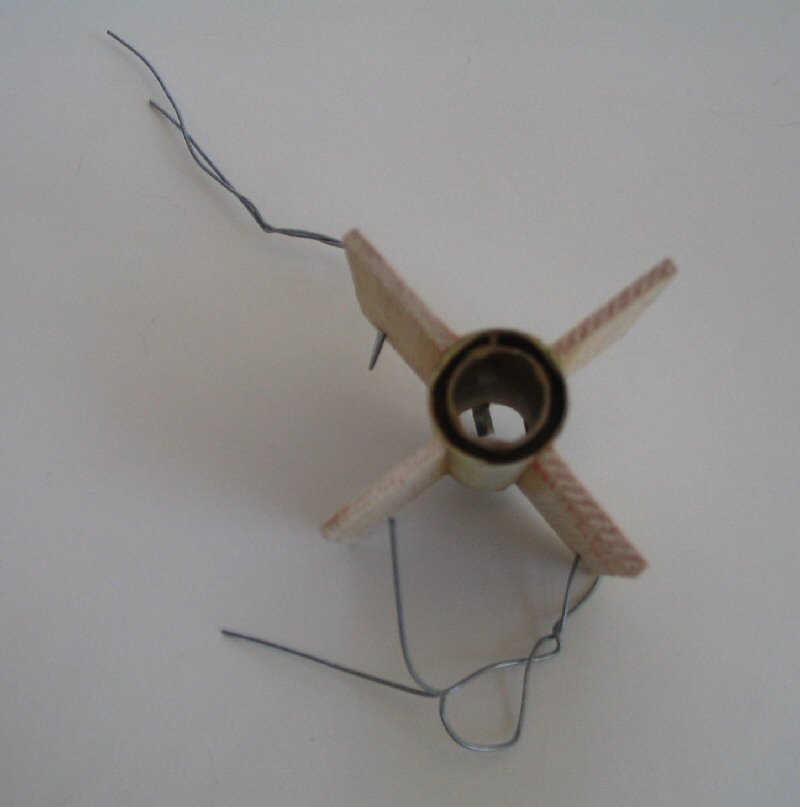
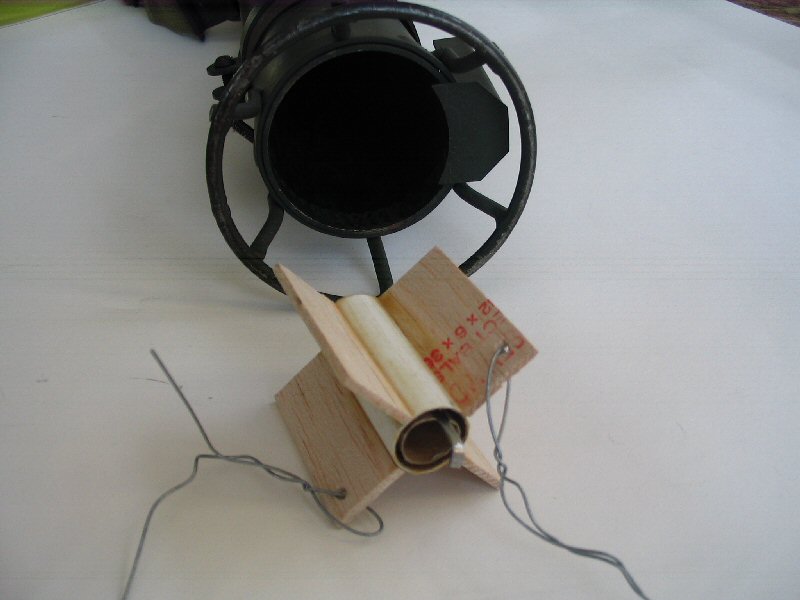
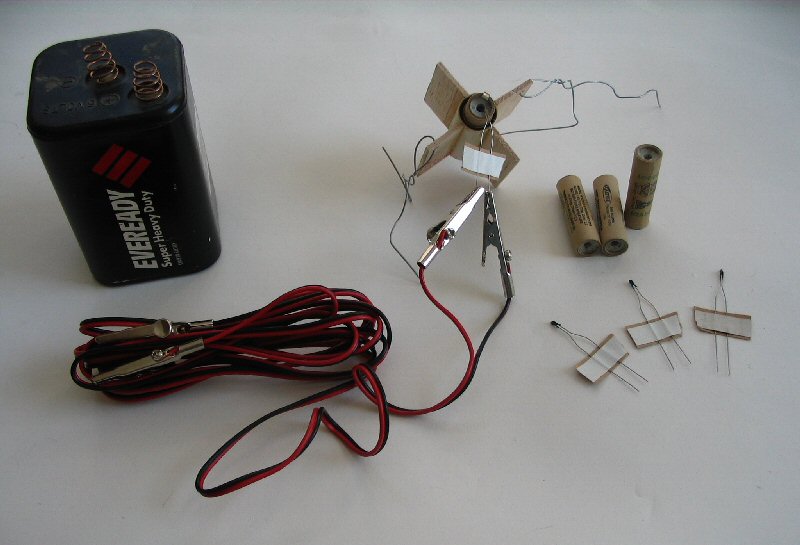
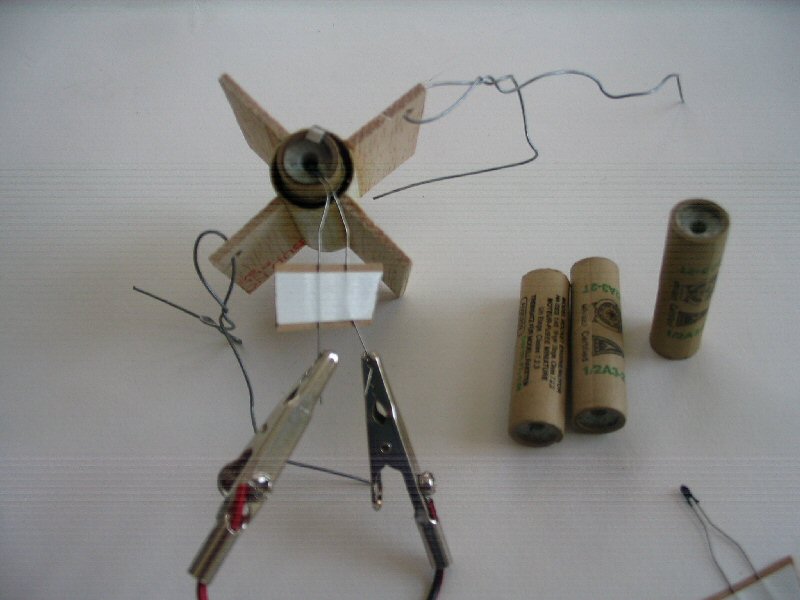
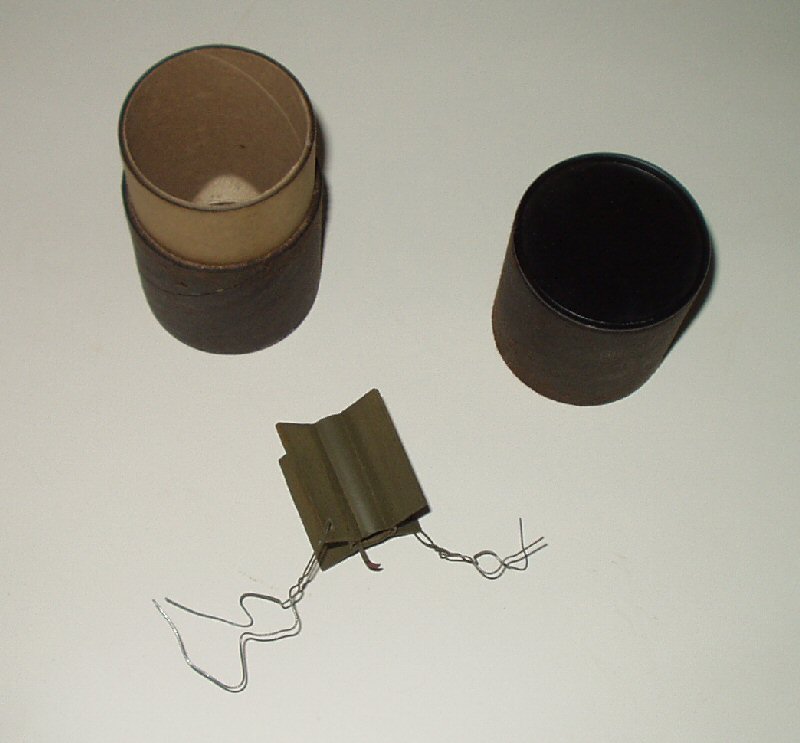
BUILDING: First I picked out an engine. I wanted to go with one that was small, had minimal burn time, and only a few seconds between engine cutout and enjection charge deployment. The ˝A3-2T fit the bill exactly. It burns for about a second with a two second delay before the ejection charge goes off. Check out this page for a full explanation of the engine numbering system. The engine assembly has a quick release mount. This lets us quickly throw another engine in there if we need to give a panzer a second hit. But, more importantly, it prevents the engine from flying out either end of the tube. The last thing I want is to send a projectile downrange and risk hitting another reenactor or member of the public. To say the least, that wouldn't be a positive development for our hobby!
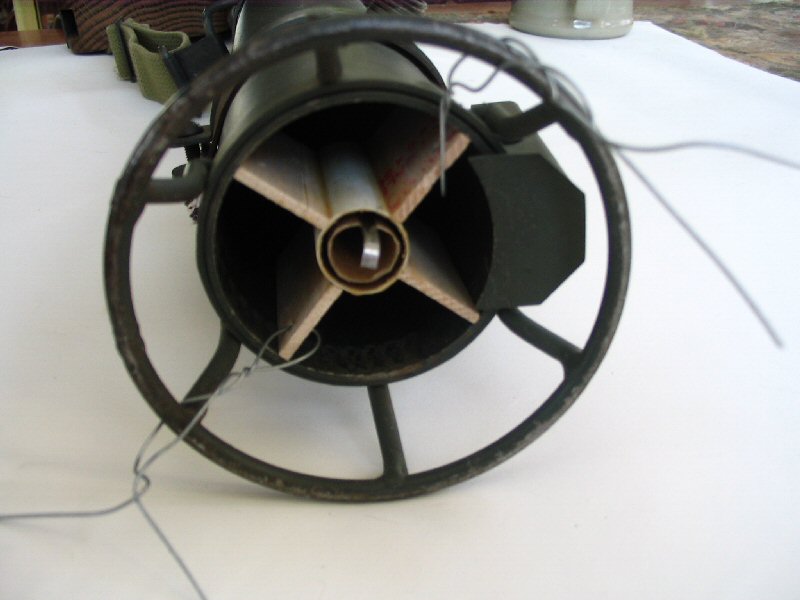
With the engine secure it was time to address the entire assembly itself. Like the engine, I didn't want it to fly out the tube either. The assembly has balsa fins on it so it'll fit snugly in the bazooka's tube. Five minutes with a drill and a little wire and that problem was solved.
Next up is the firing system. Estes engines are fired using a little electricity that heats up an igniter. A 9 volt lantern battery provides enough charge and some spare wires with alligator clips hooks everything up.
FIRING PROCEDURE: Here's where safety becomes paramount as there will be fire coming out of the bazooka and I don't want anyone to get hit with it, especially me! It will be the usual two man crew serving the weapon: gunner and assistant gunner. The gunner won't have much to do except look good for the public. The assistant gunner will be the person running the show and executing safety protocol. He'll load the engine in the back and make sure the assembly is secure.
Next step: hook up the wires to the igniter. It's important to make sure the other end of the wires aren't hooked up to the battery at this time or the engine will go off in his hand.
Next: tap the gunner on the shoulder and yell "up!" This is SOP (Standard Operating Procedure) from the Army manual. The gunner will rise to one knee and aim the bazooka at the target. Once the gunner is sited in, the assistant gunner will take a look around to make sure no one is in the blast zone behind the bazooka. If all is clear then, and only then, will he touch the wires to set the engine off. I don't want the gunner to set off the engine as he'll be concentrating on the target and doesn't have a good view of what's going on behind him. If someone moves into the blast zone just as he fires that would ruin someone's day.
Below are photos of the equipment--click on a photo to bring up a larger picture. If you have any questions on the construction feel free to drop me a note. My email address is on the home page. And here are a couple of videos my brother-in-law took of the first test firing on Christmas, 2010. The people standing around watching are some of my nieces and nephews.
And one last note: this is by far not the only way to simulate fire with your bazooka. The guys at the 90th ID based out of Wisconsin, Indiana, and Illinois, USA, have rigged their bazooka to fire a black powder charge that looks pretty darn cool. Feel free to drop them a note and ask how it's done--they're a cool bunch of guys and are happy to share information.
UPDATE: I've fired the bazooka a couple of times and it works well. For engines though I prefer the A10-0T as it gives a little longer burn time without being too excessive. The engine assembly also fits perfectly into a period hand grenade tube, which is great for protecting it durning transport. And all of the gear fits nicely into a gas mask bag for running around the field.